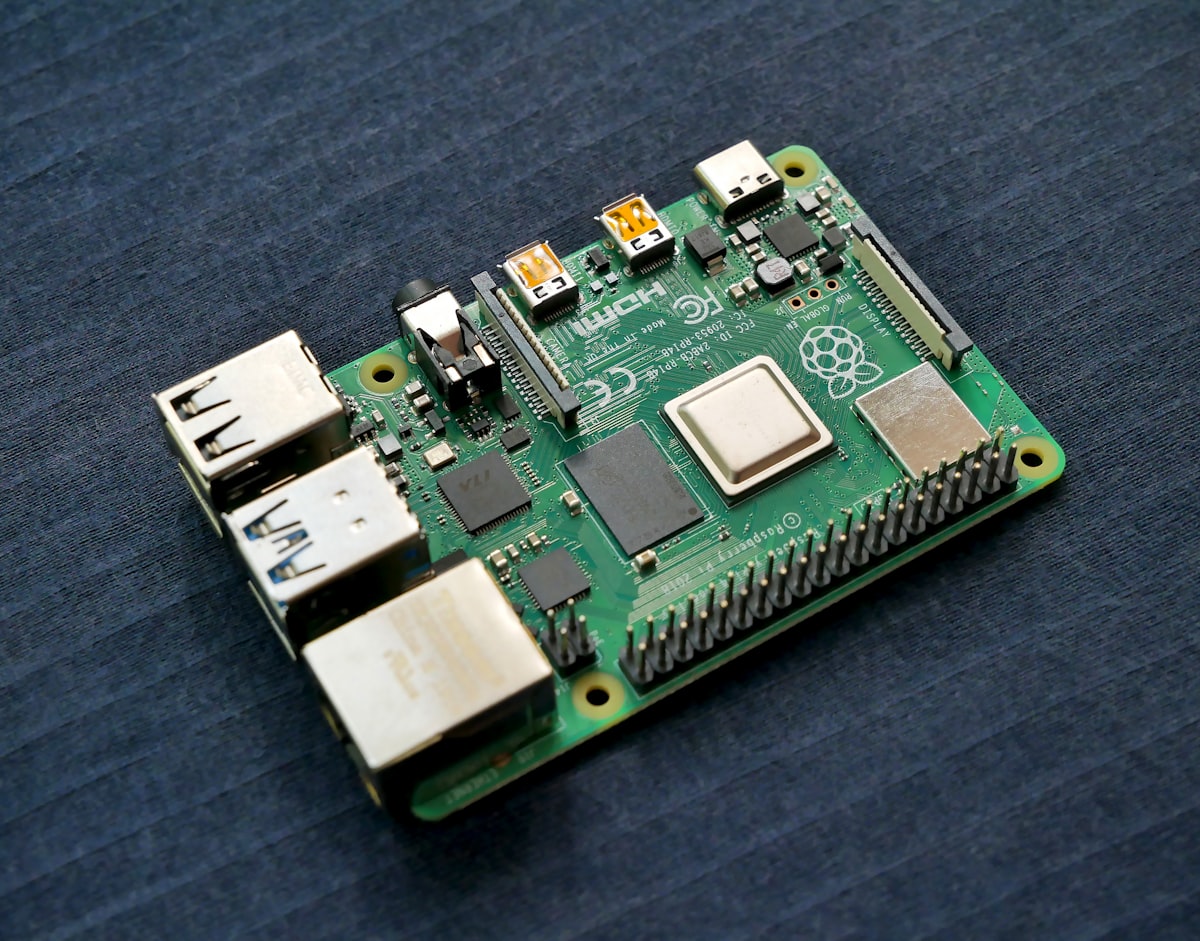
Pi-hole on a Raspberry Pi is the easiest way to block ads on every device in your home — phones, tablets, smart TVs, and more — all at once. This Pi-hole Raspberry Pi setup costs around $35, fits in your palm, and once it’s running, you’ll never manually close a pop-up ad again. You’re sitting on the couch trying to read a recipe on your phone when a video ad hijacks the screen, a banner slides up from the bottom, and a pop-up begs for notification permission — and that’s just your phone. Your kid’s tablet, your partner’s laptop, and your smart TV are all fighting the same battle. There’s one fix for all of it, and this guide walks you through every step.
You’re sitting on the couch trying to read a recipe on your phone. Three words in, a video ad takes over the screen. You close it. A banner slides up from the bottom. You scroll past. A pop-up wants to know if you’d like notifications. No, you would not.
Meanwhile, your kid’s tablet is playing some free game where every third tap triggers a full-screen ad for a casino app. Your partner’s laptop has three browser extensions fighting over which tracker to kill first. And your smart TV — the one you *already paid for* — is showing banner ads on its own home screen.
There’s a fix for all of this. It costs about thirty-five bucks, it’s the size of a deck of cards, and once it’s set up, it blocks ads on every single device in your house. Phones, tablets, laptops, smart TVs, that weird smart fridge you bought on impulse — all of them.
It’s called Pi-hole, it runs on a Raspberry Pi, and you can set it up in about 30 minutes. Let’s do it.
—
## What You’ll Need (Shopping List)
Here’s everything, with prices as of April 2026:
| Item | Est. Cost | Notes |
|——|———–|——-|
| Raspberry Pi 4 Model B (2GB) | $35-45 | 2GB is plenty. The 4GB or 8GB models work too but they’re overkill for this. Pi 5 also works great. |
| MicroSD card (16GB+) | $8-12 | Get a name brand. Cheap cards die fast. |
| USB-C power supply (5V/3A) | $10 | The official Raspberry Pi PSU is worth it. |
| Ethernet cable | $5-8 | Wi-Fi works, but wired is way more reliable for a DNS server. |
| MicroSD card reader | $6-8 | Skip if your laptop has a built-in slot. |
| Case (optional) | $5-15 | Keeps dust out. A basic one is fine. |
**Total damage: roughly $55-80** if you’re starting from scratch. Already have a Pi collecting dust? You’re looking at $0 and a free afternoon.
> **Skip this if…** you can’t access your router’s settings. If you’re in a dorm, shared apartment, or on an ISP router that locks down the admin panel, you won’t get the network-wide blocking. You can still use Pi-hole device-by-device, but the real magic comes from putting it on the whole network.
—
## What Pi-hole Actually Does (The Simple Version)
Every time your phone or laptop visits a website, it first asks a DNS server: “Hey, where do I find gadgetguidedaily.com?” The DNS server replies with an IP address, and your browser connects.
Ads work the same way. When a page loads, it quietly asks: “Where’s annoying-tracker-network.com?” Normally, your DNS server answers that too, and the ad loads.
Pi-hole steps in as your network’s DNS server. When a device asks for a real website, Pi-hole passes the request along no problem. But when it asks for a known ad or tracker domain, Pi-hole just says “never heard of it” and returns nothing.
The ad never loads. The tracker never fires. Your page actually loads *faster* because it’s not pulling junk from forty different ad servers.
Think of it like a bouncer at a club, except instead of checking IDs it’s checking domain names against a blocklist. Legit domains get in. Known ad domains get turned away at the door.
The best part? This happens for every device on your network automatically. Your smart TV can’t install ad blockers? Doesn’t matter. Pi-hole catches the ad requests before they ever reach the TV.
—
## Step-by-Step Pi-hole Setup
### Step 1: Flash the SD Card
First, you need to put an operating system on your microSD card.
1. Download **Raspberry Pi Imager** from [raspberrypi.com/software](https://www.raspberrypi.com/software/) on your regular computer.
2. Insert your microSD card into your card reader.
3. Open the Imager. Click **Choose OS** → **Raspberry Pi OS (other)** → **Raspberry Pi OS Lite (64-bit)**. You don’t need the desktop version — Lite is leaner and perfect for a server.
4. Click **Choose Storage** and select your microSD card.
5. Click the **gear icon** (or hit Ctrl+Shift+X) to open advanced settings:
– **Enable SSH** — turn this on. You’ll need it to connect remotely.
– **Set username and password** — pick something you’ll actually remember.
– **Configure Wi-Fi** — optional if you’re using Ethernet (and you should).
– **Set locale** — pick your time zone.
6. Click **Write** and wait. Takes a few minutes.
> **Pro Tip:** Write that username and password on a sticky note and slap it on the Pi’s case. I know, security people are cringing. But this is a home network box, and “I forgot the password to my own DNS server” is a pain you don’t need at 11pm when your smart TV stops working.
### Step 2: Boot Up and Find Your Pi
1. Pop the microSD card into your Raspberry Pi.
2. Connect the Ethernet cable between the Pi and your router.
3. Plug in the power supply. The Pi boots automatically — no button to press.
4. Wait about 60-90 seconds for it to fully start.
Now you need your Pi’s IP address. A few ways to find it:
– **Check your router’s admin page** (usually `192.168.1.1` or `192.168.0.1`). Look for a connected device called “raspberrypi.”
– **From your Mac/Linux terminal:** `ping raspberrypi.local`
– **On Windows:** Try the same in PowerShell, or use an app like Fing on your phone.
Write this IP down. We’ll use `192.168.1.100` as the example for the rest of this guide. Yours will probably be different.
### Step 3: SSH In and Update
Open Terminal (Mac/Linux) or PowerShell (Windows) and connect:
“`bash
ssh yourusername@192.168.1.100
“`
Type `yes` when it asks about the fingerprint, then enter your password. You’re in.
First order of business — update everything:
“`bash
sudo apt update && sudo apt upgrade -y
“`
This might take a few minutes depending on your connection speed. Good time to grab a coffee.
### Step 4: Install Pi-hole
Here’s where it gets fun. One command does the heavy lifting:
“`bash
curl -sSL https://install.pi-hole.net | bash
“`
The installer walks you through a series of blue screens with options. Here’s what to pick:
– **Upstream DNS provider** — Cloudflare (1.1.1.1) is a solid default. You can change this later, and we’ll set up something even better in the advanced section.
– **Blocklists** — Accept the default list. It’s a good starting point.
– **Protocols** — Leave both IPv4 and IPv6 enabled.
– **Static IP** — The installer will suggest using your current IP. Accept it.
– **Web admin interface** — Install it. This is your command center.
– **Web server (lighttpd)** — Install this too.
– **Query logging** — Enable it. You’ll want to see what’s getting blocked.
– **Privacy mode** — “Show everything” (level 0) is fine for a home network.
When it finishes, you’ll see a summary with your **admin dashboard URL** and a **randomly generated password**. Write the password down right now.
Lost it already? No worries. Reset it anytime with:
“`bash
pihole -a -p
“`
### Step 5: Point Your Router at Pi-hole
This is the step that makes the magic happen across your whole network.
1. Log into your router’s admin panel (usually `192.168.1.1` or `192.168.0.1`).
2. Find **DHCP settings** or **LAN settings**. The exact location varies by router brand.
3. Change the **primary DNS server** to your Pi’s IP address (`192.168.1.100` in our example).
4. **Remove or blank out** the secondary DNS server. If you leave something like `8.8.8.8` as a backup, devices will sometimes bypass Pi-hole and you’ll still see ads.
5. Save and reboot your router.
**Router won’t let you change DNS?** Some ISP-provided routers lock this down. Two workarounds:
– Change DNS on each device individually (annoying but it works).
– Disable DHCP on your router and let Pi-hole handle DHCP instead. In the Pi-hole admin, go to Settings → DHCP and enable it. Just make sure you disable it on the router *first* to avoid conflicts.
> **Pro Tip:** After changing your router’s DNS, restart your devices (or toggle Wi-Fi off and on) so they pick up the new settings. Otherwise they’ll keep using cached DNS until their DHCP lease renews, which could be hours.
### Step 6: Verify It Works
Open a browser on any device and go to:
“`
http://192.168.1.100/admin
“`
Log in with the password from Step 4. You should see the Pi-hole dashboard with queries already rolling in. Visit a few ad-heavy websites and watch the “Queries Blocked” number climb.
Quick sanity check: try visiting `ads.google.com` in your browser. If Pi-hole is running, the page won’t load. That’s working as intended.
### Step 7: Whitelist Things That Break
Here’s the reality — Pi-hole will occasionally block something you actually need. A link in a marketing email, a CDN that serves both ads and legit content, stuff like that.
When something breaks:
1. Open the Pi-hole admin dashboard.
2. Go to **Query Log**.
3. Look for blocked domains (shown in red) around the time the thing broke.
4. Click the domain and hit **Whitelist**.
Common domains people end up whitelisting:
– `s.youtube.com` — YouTube watch history and progress
– `clients4.google.com` — Some Android app functionality
– `dl.delivery.mp.microsoft.com` — Windows updates
– `officeclient.microsoft.com` — Microsoft 365 activation
– `gravatar.com` — WordPress comment avatars
Or whitelist from the command line:
“`bash
pihole -w s.youtube.com
“`
Here’s a funny thing about the first week with Pi-hole. You turn into a DNS detective. “Why won’t this smart plug connect?” *Checks query log.* “Ah, it’s trying to phone home to a server in Shenzhen at 3am. Blocked.” You start realizing how chatty your devices are behind your back, and honestly it’s equal parts fascinating and deeply unsettling. My robot vacuum was making 6,000 DNS requests a day. *Six thousand.* What is it reporting? My floor plan? My shame?
—
## Common Problems and Fixes
**Ads still showing up (especially YouTube and Twitch)**
YouTube serves ads from the same domains as actual video content. Blocking those domains breaks the videos themselves. For YouTube specifically, you still need a browser extension like uBlock Origin. Same deal with Twitch. Pi-hole handles the other 95% of the internet’s ads beautifully, though.
**Dashboard shows zero queries**
Your devices aren’t using Pi-hole yet. Double-check your router’s DNS settings. Make sure only Pi-hole’s IP is listed. Then restart your devices.
**Certain websites won’t load**
Check the query log, find the blocked domain, whitelist it. The log tells you exactly which domain got blocked, so there’s no guessing involved.
**”DNS service not running” on the dashboard**
SSH back into the Pi and run:
“`bash
pihole restartdns
“`
If that doesn’t fix it:
“`bash
pihole -r
“`
Pick “Repair” to reinstall without losing your settings or blocklists.
**Internet stops working after a power outage**
Your Pi probably got a different IP address. Log into your router, find the Pi, and set up a DHCP reservation so it always gets the same IP. (More on this in the advanced section.)
**One specific device still shows ads**
Some devices (Google Home, Chromecast, some smart TVs) have hardcoded DNS servers like `8.8.8.8` baked in. They’ll ignore your router’s DNS settings entirely. The fix is a firewall rule on your router that redirects all port 53 (DNS) traffic to your Pi-hole. Not every router supports this, but if yours does, it’s worth setting up.
—
## Advanced Tips
### Add More Blocklists
The default blocklist catches the big stuff, but you can tighten the net. In the Pi-hole admin, go to **Adlists** and add URLs for additional blocklists.
Good starting points:
– **The Firebog “Ticked” Lists** — [firebog.net](https://firebog.net/) — Curated, community-vetted lists unlikely to cause false positives.
– **OISD** — [oisd.nl](https://oisd.nl/) — A well-maintained all-in-one list covering ads, trackers, and malware domains.
After adding new lists, update gravity:
“`bash
pihole -g
“`
Don’t go overboard. More blocklists means more potential for accidentally blocking something legit. Start with one or two extras and see how it goes for a week before adding more.
### Set Up Unbound as a Recursive DNS Resolver
Right now, your Pi-hole is forwarding DNS queries to Cloudflare (or whatever upstream you picked). That means Cloudflare still sees every domain your household visits.
Want full privacy? Install **Unbound** and let your Pi resolve DNS queries by itself, talking directly to authoritative name servers. No middleman.
“`bash
sudo apt install unbound -y
“`
Create the Pi-hole config for Unbound:
“`bash
sudo nano /etc/unbound/unbound.conf.d/pi-hole.conf
“`
Paste this:
“`
server:
verbosity: 0
interface: 127.0.0.1
port: 5335
do-ip4: yes
do-udp: yes
do-tcp: yes
do-ip6: no
prefer-ip6: no
harden-glue: yes
harden-dnssec-stripped: yes
use-caps-for-id: no
edns-buffer-size: 1232
prefetch: yes
num-threads: 1
so-rcvbuf: 1m
private-address: 192.168.0.0/16
private-address: 172.16.0.0/12
private-address: 10.0.0.0/8
“`
Restart Unbound and test it:
“`bash
sudo systemctl restart unbound
dig google.com @127.0.0.1 -p 5335
“`
If you get a response with an IP address, it’s working. Now go to Pi-hole admin → **Settings** → **DNS**, uncheck your upstream provider, and add `127.0.0.1#5335` as a custom upstream DNS server. Save.
Your DNS queries now go directly from your Pi to the authoritative servers. Your ISP sees nothing. Cloudflare sees nothing. Pretty solid privacy upgrade for 10 minutes of work.
### Reserve a Static IP on Your Router
The Pi-hole installer sets a static IP on the Pi itself, but you should also reserve that IP in your router’s DHCP settings. This prevents IP conflicts if the router restarts and tries to assign that address to something else.
Log into your router, find DHCP reservation (sometimes called “address reservation” or “static lease”), and tie your Pi’s MAC address to its current IP.
### Automate Pi-hole Updates
Keep everything current without thinking about it:
“`bash
crontab -e
“`
Add this line:
“`
0 3 * * 0 pihole -up > /dev/null 2>&1
“`
This updates Pi-hole every Sunday at 3am. Gravity (your blocklists) already auto-updates via Pi-hole’s built-in cron job.
—
## Frequently Asked Questions
### Does Pi-hole actually speed up my internet?
It can, yeah. Pages load faster because your devices aren’t downloading ads, trackers, and analytics scripts. The DNS lookup through Pi-hole adds maybe 1-2 milliseconds — completely unnoticeable. The time saved by not loading ad garbage more than makes up for it.
### Can I use Pi-hole when I’m away from home?
Not by default, but you can set up a VPN (like WireGuard or PivPN) alongside Pi-hole. Then when you’re on mobile data or public Wi-Fi, you tunnel through your home network and get ad blocking everywhere. It takes some extra setup but it’s well worth it.
### Does it block ads inside phone apps?
Yes — that’s one of the biggest wins. Any app that pulls ads from a known ad domain gets those requests blocked. Some apps use first-party ad serving (serving ads from their own domain), and Pi-hole can’t catch those without breaking the app. But you’ll see a huge reduction overall.
### Do I need a Raspberry Pi specifically?
Nope. Pi-hole runs on any Linux machine — an old laptop, a mini PC, a Docker container, a virtual machine. The Raspberry Pi is just the most popular choice because it’s cheap, silent, and sips about $3-5 of electricity per year running 24/7.
### What if my Raspberry Pi crashes or loses power?
Your devices won’t be able to resolve DNS, which means the internet effectively goes down until the Pi comes back online or you change your DNS settings. For most homes, a reliable power supply and an Ethernet connection is enough. If you want redundancy, run a second Pi-hole on another device and list both IPs in your router’s DNS settings.
### Is blocking ads with Pi-hole legal?
Completely. You’re choosing which DNS server your home network uses and which domains it resolves. There’s no law against that. It’s your network and your choice.
—
## What to Do Next
You’ve got a working Pi-hole. Nice. Here’s where to go from here:
– **Watch your dashboard for a week.** Most homes see 15-35% of all DNS queries blocked. That’s traffic your devices were downloading silently before — ads, trackers, telemetry, all of it.
– **Fine-tune your whitelist** as things come up. Check the query log whenever something breaks and whitelist the domain. It gets less frequent after the first week.
– **Set up Unbound** if you haven’t already. Ten extra minutes for a solid privacy upgrade.
– **Look into PivPN** so you get ad blocking on your phone even when you’re out.
– **Join the Pi-hole community** at [discourse.pi-hole.net](https://discourse.pi-hole.net/) for tips, blocklists, and help from people who’ve been running this setup for years.
—
*Disclaimer: Blocking ads with Pi-hole is legal for personal use. Some websites depend on ad revenue to stay online — consider whitelisting sites you want to support, or supporting them through subscriptions and donations. Prices listed are approximate and may vary by retailer and region. Pi-hole is open-source software and installation steps may change — always check the [official Pi-hole documentation](https://docs.pi-hole.net/) for the latest instructions. Some links on this page are affiliate links. We earn a small commission at no extra cost to you, which helps keep gadgetguidedaily.com running.*